In this article we will cover the process of installing the Raspberry Pi microcomputer on a Chinese RC car in a scale of 1:10. Raspberry Pi will controls the car using the Wi-Fi protocol through the Android application.
Equipment list needed for project:
- toy RC car in scale 1:10;
- Raspberry Pi mini-PC;
- brushless motors driver L298N
- 5.5v 2700mAh battery for motors
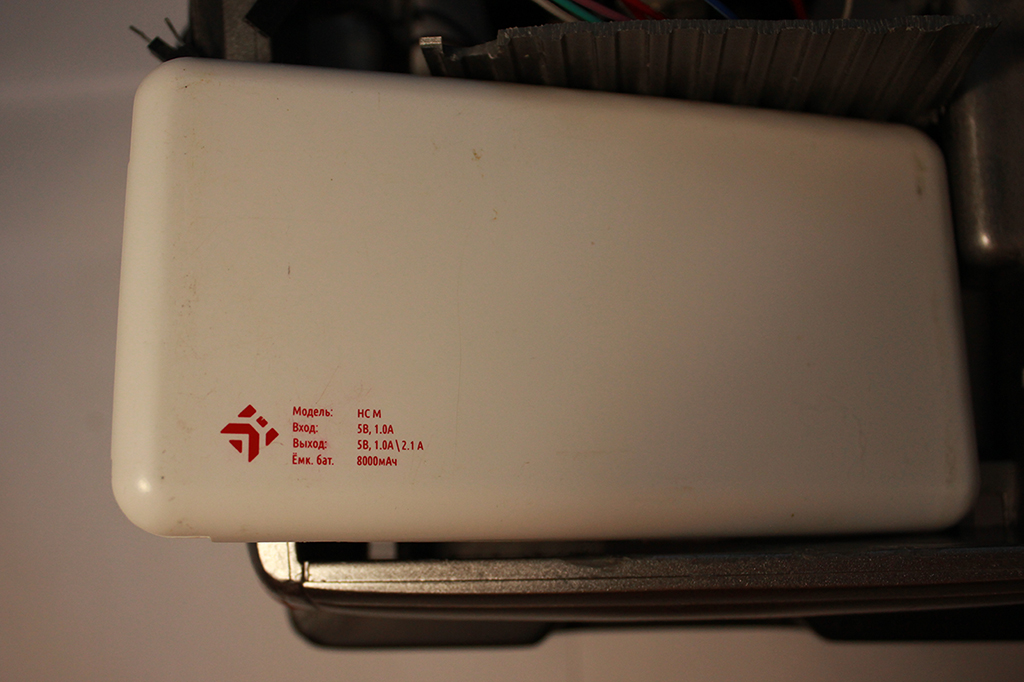
- 5v 8000mAh battery for Raspberry Pi
- 2x brushless motors (from RC car model);
- Wi-fi modem (if wi-fi not included in Raspberry Pi);
Content:
- RC car model selection
- Installing the hardware
- Power supply
- Installing the software
- Mobile app
- Launching the car model
1. RC car model selection
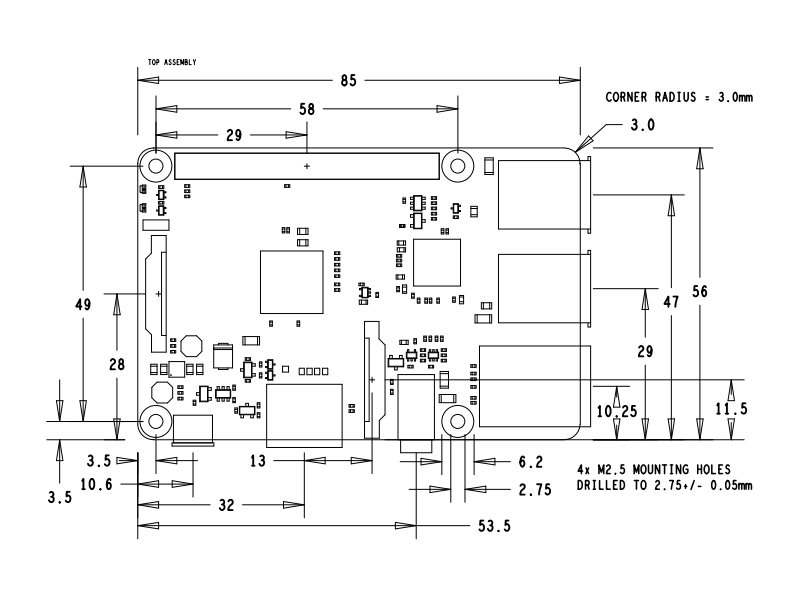
It is necessary to choose a model for alteration taking into account the dimensions of the Raspberry Pi computer (85x56mm) (see Fig. 1) and engine driver L298N (50x50mm). The most suitable scale starts from 1:10, with the base of the model from 400x70mm. The engines of the model must have sufficient power reserve to be able to install additional equipment on the model weighing up to 300g (for example, an external battery for the Raspberry Pi).
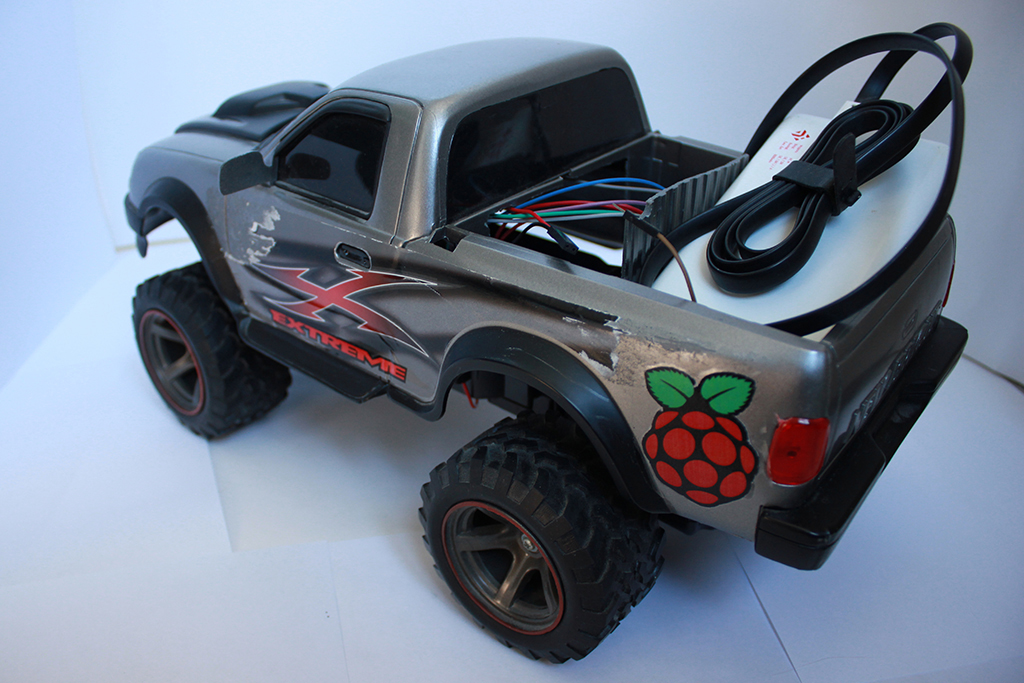
For this project, was purchased the radio-controlled pickup model from the toy store at a cost of about 20 $. The pickup has the body that allows you to place an additional battery.


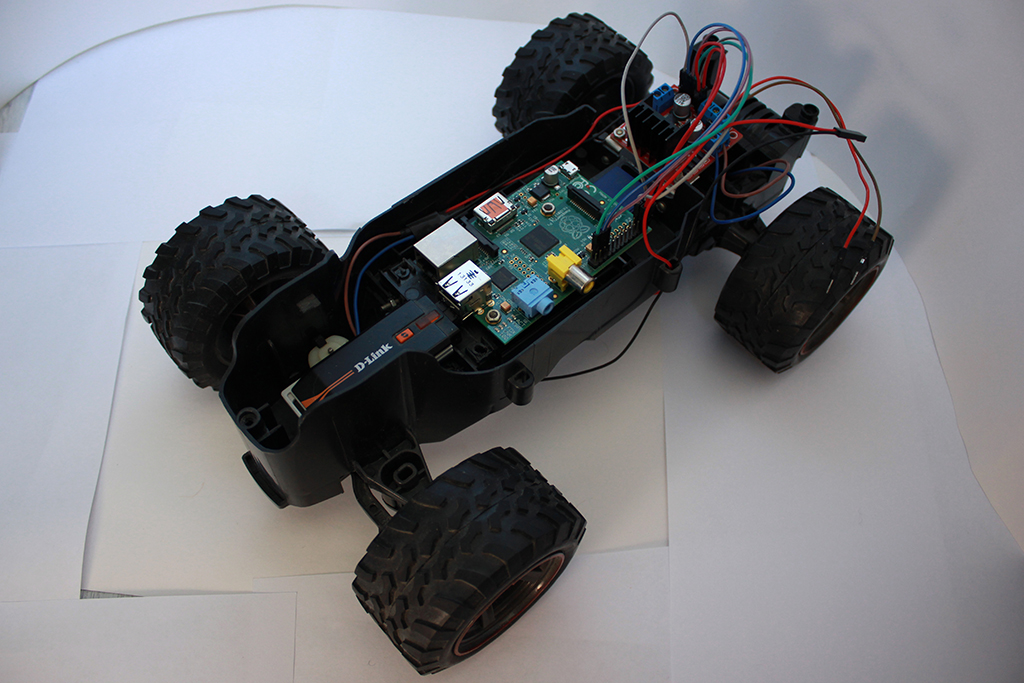
2. Installing the hardware
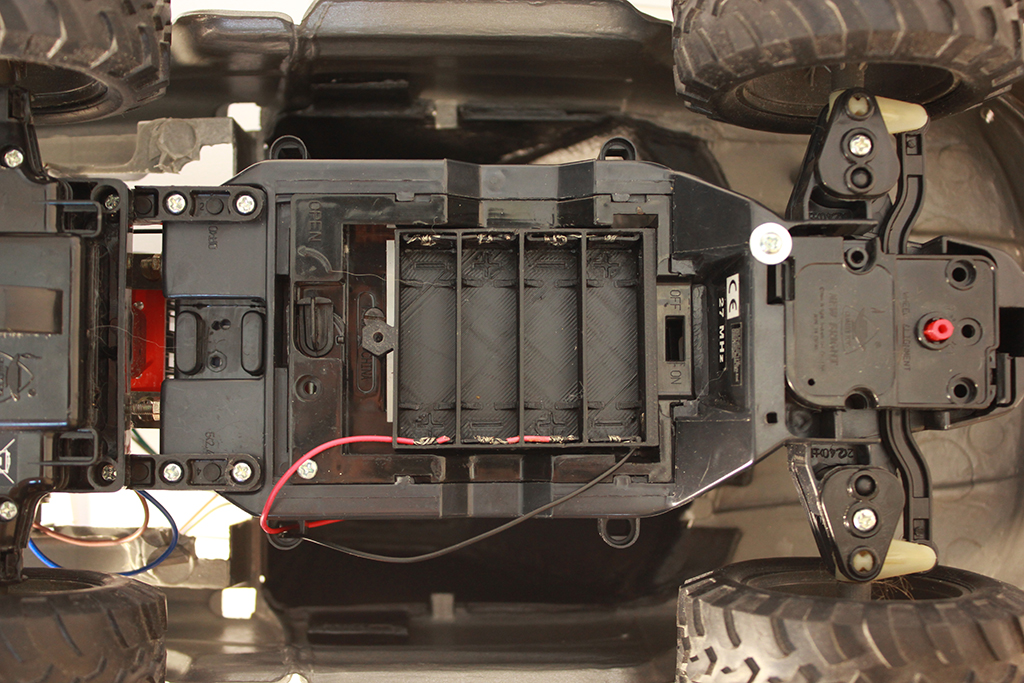
After choosing and purchasing a model, you need to disassemble it and get all the unnecessary parts. In our case, this is the radio control module, Raspberry Pi will be installed instead. Leave the motors and battery pack.
Carefully cut off the wires leading to the motors from the radio control module, we will need them to connect the motors to the driver later.
Mark the place on the base of the model for installing the Raspberry Pi and the engine driver. The driver will be connected to the Raspberry pins, so place it from the side closest to the pins. Сonnect the driver to the Raspberry Pi pins according to the scheme shown in Fig. 2.
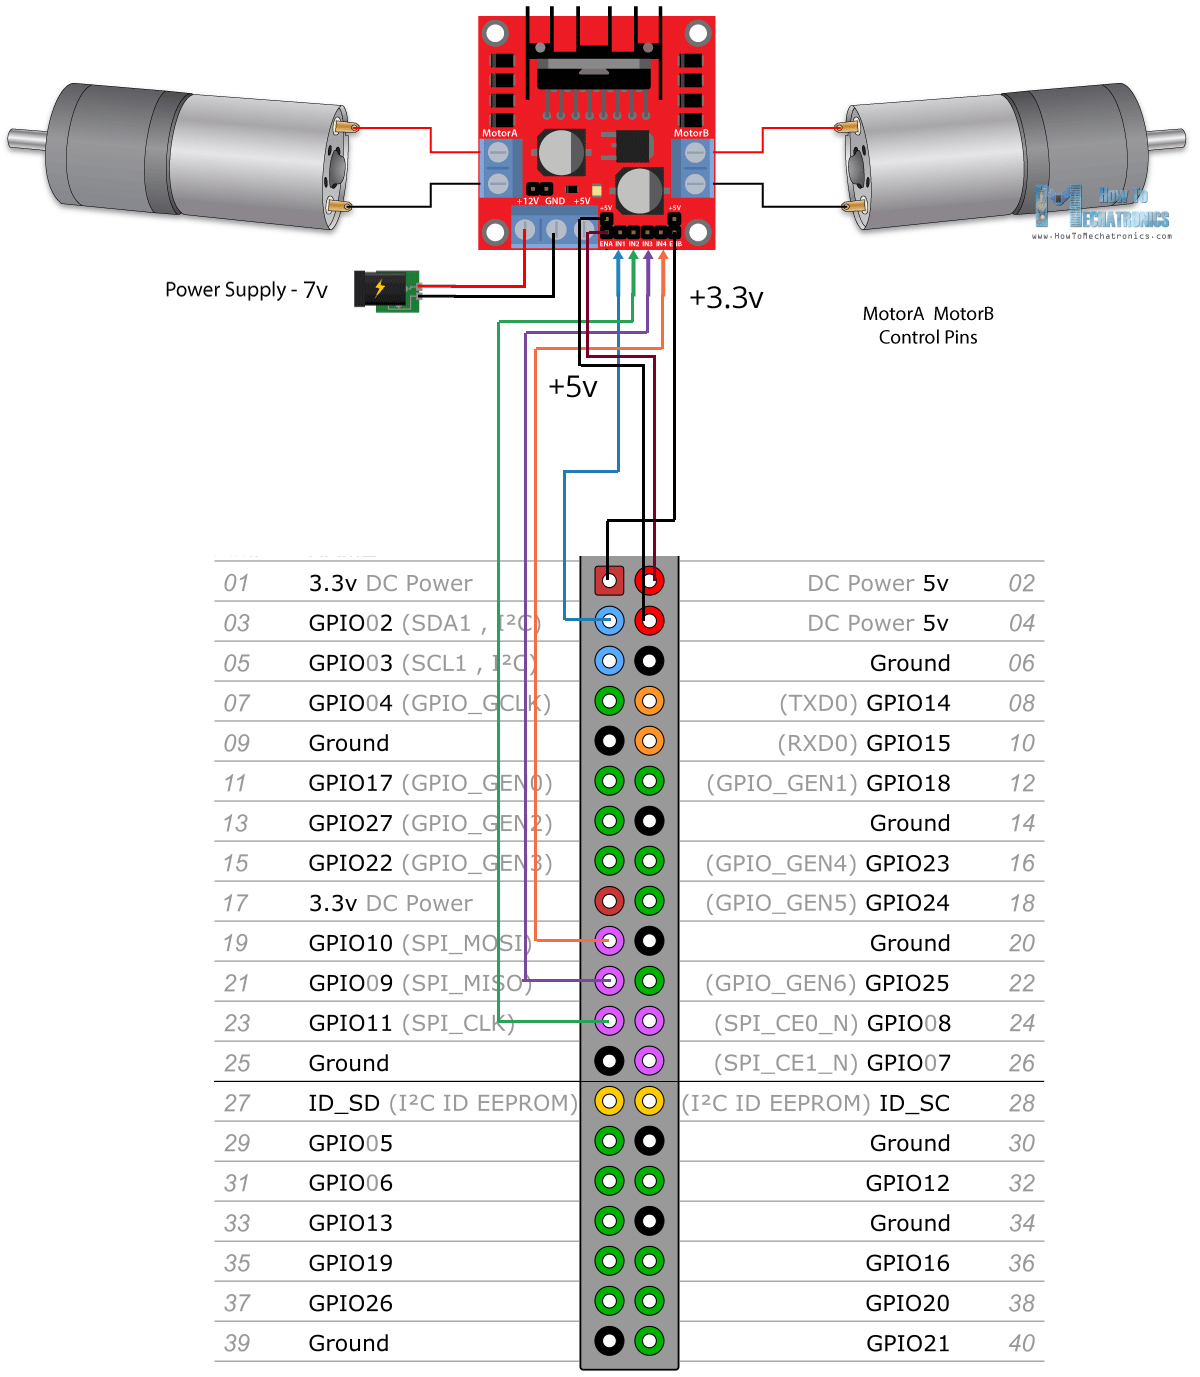
You can connect motors to any available pins on the Raspberry Pi. In the mobile application, it is possible to specify the numbers of control pins.
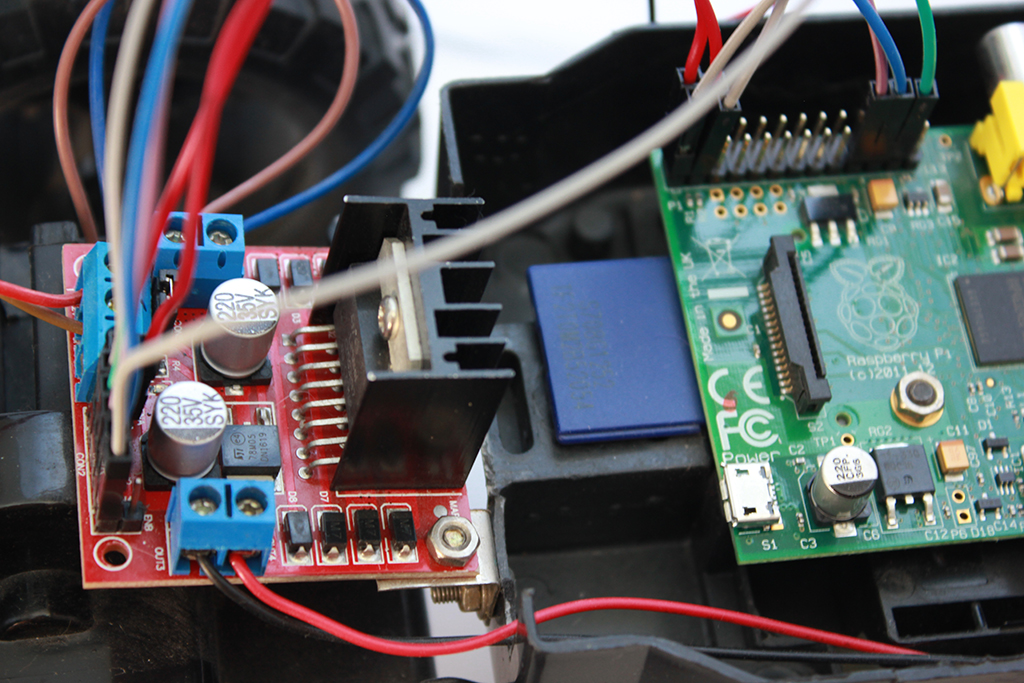
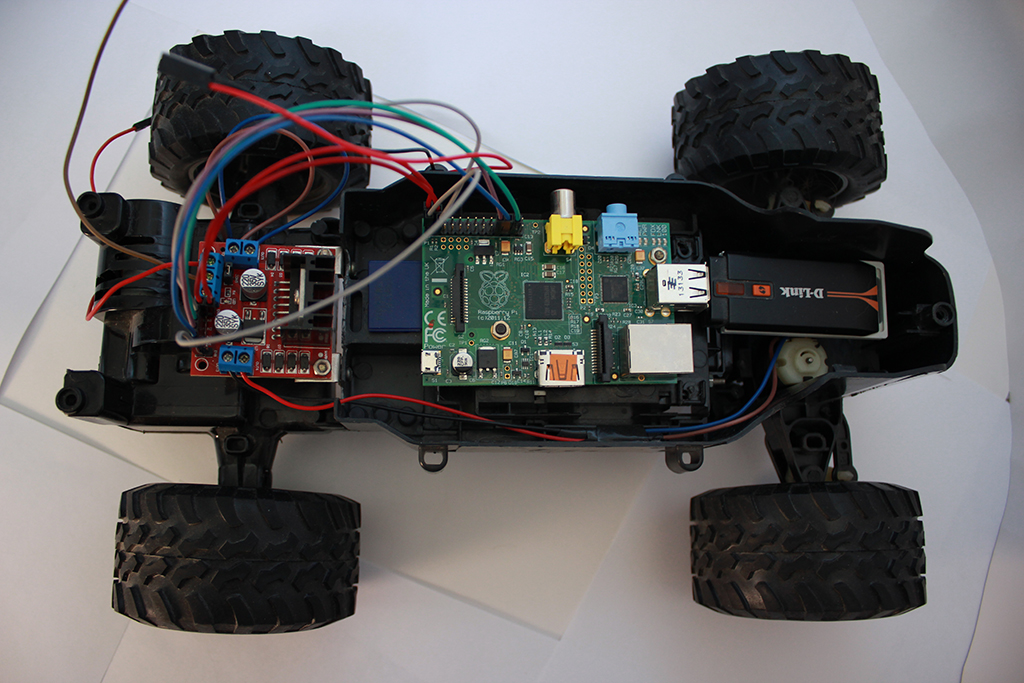
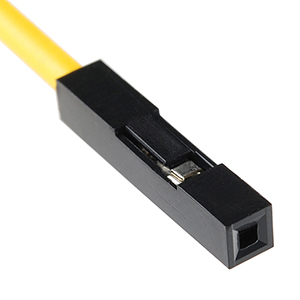
To connect the driver to the Raspberry Pi pins, you must use special connecting wires (Fig. 3). To connect the battery to the driver, use wires with a connector to be able to disconnect / connect the battery.
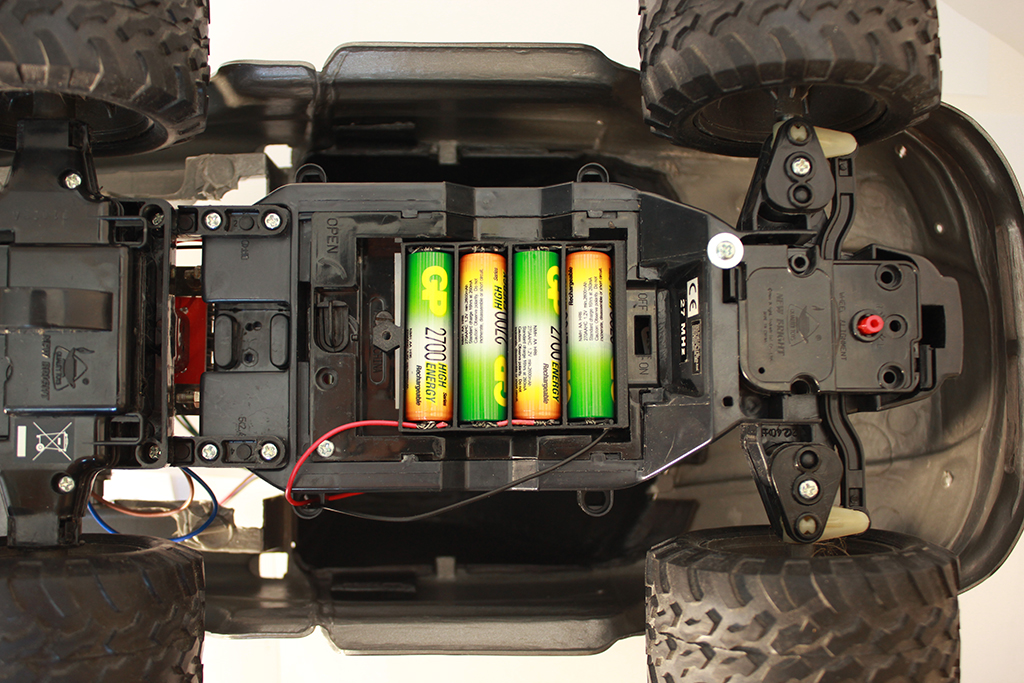
3. Power supply
Two batteries will provide power supply. One battery 7v and a capacity of 2500 mAh will power the driver and engines, you can take the battery that came with the model. The second external battery 5v and a capacity of 8000 mAh will power the Raspberry Pi.
4. Installing the software
Raspberry Pi will be controlled via Wi-Fi using the Webiopi library. This library is written in Python and allows you to manage Raspberry Pi pins via HTTP protocol. To install the Webiopi library on a Raspberry Pi you need to:
View the latest webiopi version number on the site and replace x.y.z with the latest version number.
Enter a sequence of commands on Raspberry Pi console:
$ tar xvzf WebIOPi-x.y.z.tar.gz
$ cd WebIOPi-x.y.z
$ sudo ./setup.sh
To start webiopi background-task, enter the command:
sudo /etc/init.d/webiopi startIn order not to start webiopi manually after each launch of Raspberry Pi, you need to add webiopi to autorun with the command:
$ sudo update-rc.d webiopi defaultsThe username and password of the webiopi user can be changed with the command:
$ sudo webiopi-passwdThe standard account has a username “pi” and a password of “raspberry”.
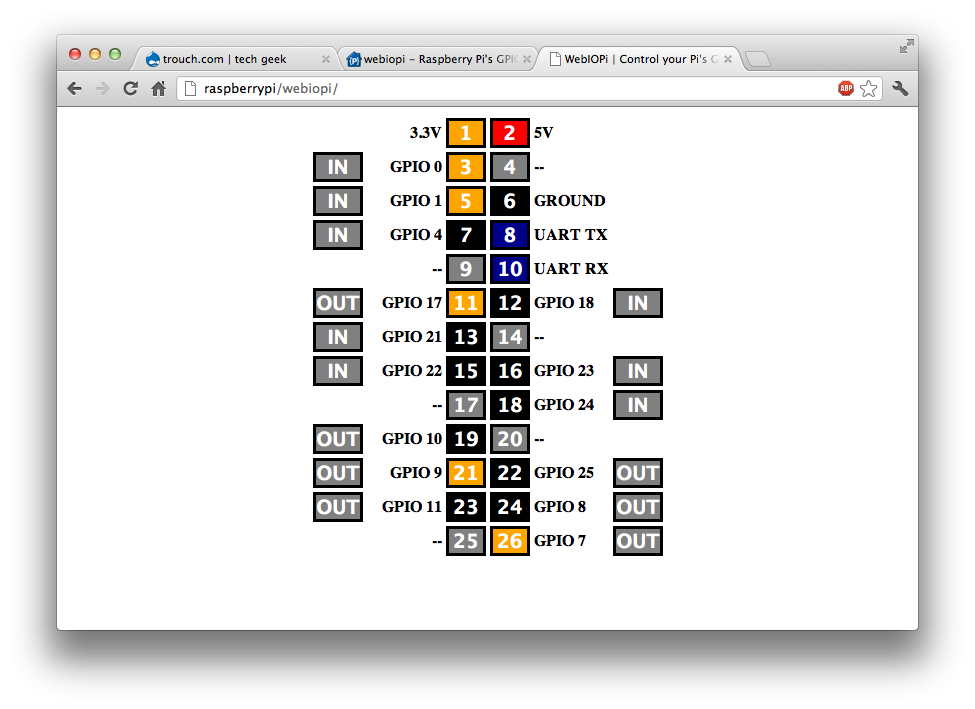
You can verify the successful installation of webiopi by going to the Raspberry IP address on the page http: // ip_address_raspberry / webiopi
On this page, you will see the Raspberry Pi port management interface.
To search for the IP address of the Raspberry Pi inside the local network, you can use any third-party software, for example, the «ipscan» program.
5. Mobile app
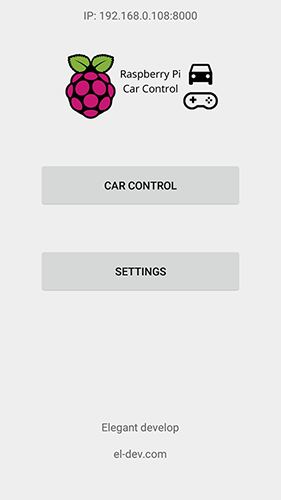
The car model will be remotely managed using the Android app developed specifically for this project. After installing the application on your Android, you can enter the data for connecting to the Raspberry Pi. In the app settings, enter the IP address of the Raspberry Pi, the username and password of the webiopi user (standard username «pi» and the password «raspberry»), as well as the port numbers of the Raspberry Pi used to control the engines.
 | 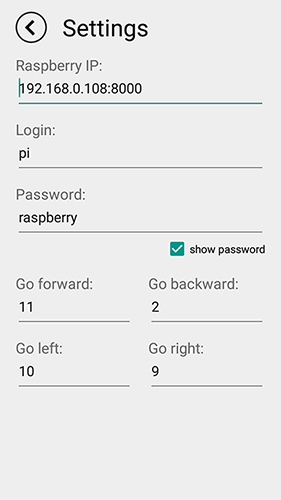 |
After saving the settings in the mobile application, you can proceed to launch the model.
6. Launching the car model
The launch of the model begins with connecting an external power supply to the Raspberry Pi. Then you need to wait for the system to boot. If everything is configured correctly, the webiopi library should be started automatically.
The Android device from which the Raspberry Pi will be controlled must be on the same local network as the Raspberry Pi. The easiest way is to connect to one Wi-Fi modem or distribute Wi-Fi from your phone and connect Raspberry to it.
Open the Car Control app on your mobile device. Click on the Car Control button. If the application is successfully connected to the Raspberry Pi, the status line will say “connected”.
After successfully connecting to the Raspberry Pi via the mobile application, you can connect power to the engine driver. If everything is connected correctly, the red LED on the driver will light up. Pressing a button in the application sends a signal to the Raspberry Pi to turn on a specific pin, after which the signal is transmitted to the driver and the corresponding engine starts to spin.